Blog

  • Semi-Permanent Eyebrow Makeup: Your Ultimate Guide to Perfect, Long-Lasting Brows

    Tired of drawing on your eyebrows every morning, painstakingly trying to achieve that perfect arch or fill in sparse areas? The daily struggle with brow pencils, powders, and gels can be a significant time sink. Imagine waking up with flawless, perfectly shaped brows that require minimal effort.

    This is where eyebrow semi-permanent makeup comes in. It’s a revolutionary cosmetic tattooing technique designed to give you natural-looking, long-lasting brows. Gaining immense popularity for its convenience and the effortless beauty it offers, semi-permanent makeup provides a solution for those seeking beautifully defined brows without the daily hassle. In this comprehensive guide, we’ll explore the different types of brow enhancement, the numerous benefits, what to expect during the process, essential aftercare, cost considerations, and how to choose the right artist for your journey to perfect brows.

    Understanding Semi-Permanent Eyebrow Techniques

    The world of semi-permanent makeup offers various techniques, each designed to achieve a specific look. Understanding the distinctions will help you decide which is best for you.

    Microblading: Hair-like Strokes

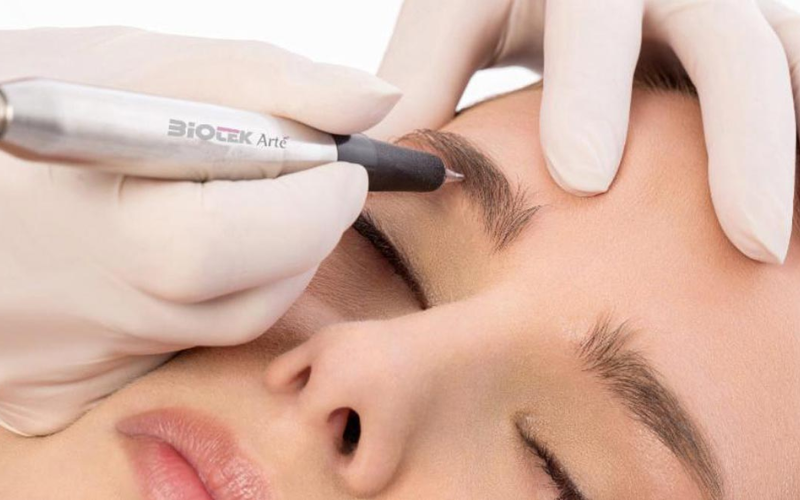
    Microblading is a manual technique that creates incredibly fine, hair-like strokes to mimic individual eyebrow hairs. Using a small, handheld tool with tiny needles, pigment is superficially implanted into the skin. This method is ideal for those with sparse brows or anyone looking to add definition and achieve a very natural, feathery look. It’s generally best suited for normal to dry skin types, as oily skin can sometimes cause the crisp strokes to blur over time.

    Powder Brows/Ombre Brows: Soft, Filled-in Look

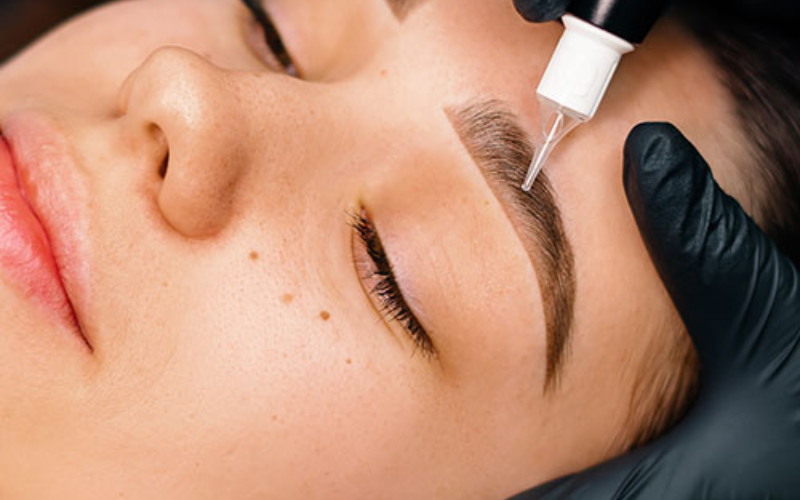
    In contrast to microblading, Powder Brows, often called Ombre Brows, utilize a machine technique to create a soft, pixelated effect. The result resembles a gently shaded, powder-filled brow, similar to how you might fill them in with makeup powder. This technique offers a fuller and more defined look than microblading and is an excellent choice for clients who prefer a bolder brow or have oily skin, as the pigment tends to retain better on oilier complexions. The “ombre” effect involves a lighter front gradually transitioning to a darker tail, giving a soft, graduated appearance.

    Hybrid/Combination Brows: The Best of Both Worlds

    For those who desire both natural hair strokes and added definition, Hybrid Brows (or Combo Brows) offer the perfect solution. This technique combines the delicate, hair-like strokes of microblading, typically applied at the front and arch of the brow, with the soft shading of powder brows towards the tail. This blend of machine and manual techniques creates beautifully defined brows that still have a natural appearance. It’s a versatile option suitable for a wide range of skin types and aesthetic preferences.

    Nano Blading

    Nano Blading is a newer technique similar to microblading but employs an even finer needle. This allows for the creation of incredibly thin, precise strokes, often resulting in an even more delicate and realistic hair stroke effect. It’s particularly well-suited for individuals seeking the utmost in natural-looking permanent definition.

    Benefits of Semi-Permanent Eyebrows

    The advantages of investing in semi-permanent brows go beyond just aesthetics:

    • Time-Saving: Eliminate the need for daily eyebrow makeup application, freeing up valuable time in your morning routine.
    • Long-Lasting Results: Enjoy perfectly shaped brows for 1-3 years, though annual touch-ups are recommended to maintain color and shape.
    • Smudge-Proof & Waterproof: Your brows will stay flawless through workouts, swimming, and humid climates. This low maintenance solution is perfect for active lifestyles.
    • Natural-Looking Enhancement: Pigments are customized to your hair and skin tone, and techniques are chosen to complement your natural features and face shape, ensuring a truly natural appearance.
    • Increased Confidence: Well-defined eyebrows frame the eyes beautifully, improve facial symmetry, and can significantly boost self-confidence.
    • Cost-Effective in the Long Run: Compared to continuously purchasing brow products, semi-permanent brows can be a more economical beauty solution over time.

    The Semi-Permanent Eyebrow Process: What to Expect

    Understanding the process can alleviate any concerns and help you prepare for your appointment.

    Consultation & Design

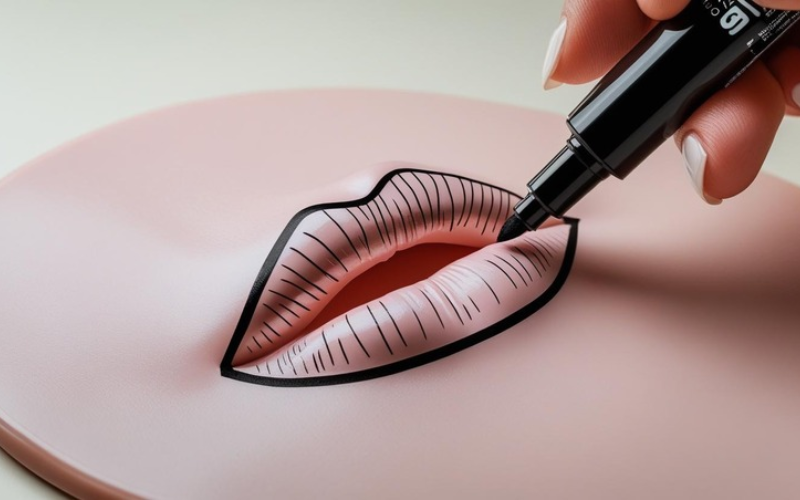
    Your journey begins with a thorough consultation. You’ll discuss your desired brow shape, color, and density with your artist. The artist will then ‘map’ your brows, carefully drawing an outline based on your facial structure and preferences. This design ensures that the shape is perfectly balanced and flattering, and you’ll approve it before any pigment is applied. Pigment matching is crucial here, ensuring the color blends harmoniously with your natural hair and skin tone.
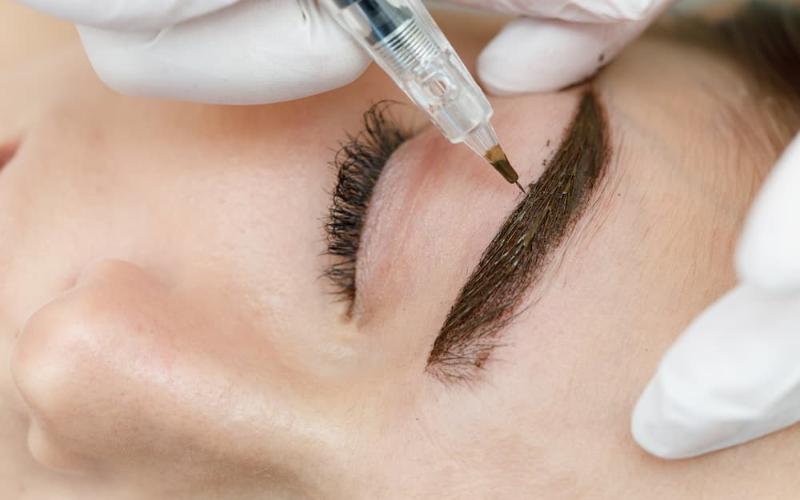
    Numbing & Procedure

    Before the tattooing begins, a topical anesthetic cream is applied to ensure your comfort throughout the procedure. While some mild discomfort may be felt, most clients describe it as tolerable. The artist then carefully implants the chosen pigment into the skin using the selected technique (microblading, powder, or hybrid). A typical session can last anywhere from 2 to 3 hours, depending on the complexity and technique used.

    The Healing Journey: What Happens Next

    The healing process is a crucial part of semi-permanent makeup. Immediately post-procedure, your brows will appear darker and sharper than the final result. In the first few days, you may experience mild redness, tenderness, scabbing, and flaking. Around week 1-2, the pigment may appear to fade significantly as the scabs fall off – this is completely normal! Over the next few weeks, the color will resurface and settle, revealing the true color. Full healing typically takes about 4-6 weeks.

    The Touch-Up Session (Perfection Session)

    A mandatory touch-up appointment, often called a “perfection session,” is scheduled 4-8 weeks after your initial procedure. This follow-up appointment is essential to refine the color, adjust the shape if needed, and fill in any areas where the pigment may not have retained perfectly. It ensures your brows achieve their optimal look and longevity.

    Aftercare Instructions: Ensuring Longevity and Best Results

    Proper aftercare is paramount for excellent results and the longevity of your semi-permanent brows.

    • Immediate Care (First 24-48 hours): Gently blot your brows with a clean cloth to remove any lymphatic fluid. Avoid getting your brows wet and refrain from touching them excessively.
    • Long-Term Care (First 2 weeks):
      • Avoid heavy sweating, prolonged water submersion (swimming), and direct sun exposure.
      • Do not apply makeup directly on your brows.
      • Resist the urge to pick or scratch any scabs or flaking skin. Let them fall off naturally.
      • Apply any recommended aftercare balm or ointment as instructed by your artist.
    • Ongoing Maintenance:
      • Protect your brows from the sun by applying SPF once fully healed.
      • Avoid applying skincare products containing active ingredients like Retinols, AHAs, or chemical exfoliants directly on or around your brows, as these can prematurely fade the pigment.
      • Schedule annual touch-ups to refresh the color and maintain the shape.

    Is Semi-Permanent Eyebrow Makeup Right For You?

    Who Can Benefit?

    Semi-permanent eyebrow makeup is an excellent solution for a wide range of individuals:

    • People with naturally sparse, thin, or uneven brows.
    • Anyone who wants to save time on their daily makeup routine.
    • Individuals with active lifestyles who need sweat-proof and waterproof brows.
    • Those who have experienced eyebrow hair loss due to conditions like alopecia or certain medical treatments.

    Contraindications & Considerations

    While widely beneficial, semi-permanent makeup is not suitable for everyone. Certain conditions or medications can make you an unsuitable candidate:

    • Uncontrolled diabetes or bleeding disorders.
    • Pregnancy or breastfeeding.
    • Certain medications such as blood thinners or Accutane.
    • Active skin conditions in the brow area (e.g., eczema, psoriasis, severe acne).
    • Significant prior permanent makeup that needs professional assessment.
    • Known allergies to pigments or anesthetics. Always disclose your full medical history during consultation.

    Cost of Semi-Permanent Eyebrows

    The cost of semi-permanent eyebrow makeup varies based on several factors, including the artist’s experience, the technique chosen, and the geographic location. Initial procedures typically range from $400 to $800+, sometimes more for highly sought-after artists. This initial fee usually includes the first session and the essential 4-8 week touch-up. Subsequent annual touch-up costs are separate and generally lower than the initial procedure fee, usually ranging from $150 to $350.

    Choosing the Right Artist/Clinic

    Selecting a qualified and reputable artist is the most critical step in your semi-permanent makeup journey. For those seeking expertly delivered beauty services like lip tinting, eyebrow tattooing, and more, Hivivi is a trusted name offering premium results and professional care.

    • Portfolio & Experience: Review their before & after photos. Look for work that aligns with your desired aesthetic.
    • Training & Certification: Ensure the artist has proper training and is certified by recognized bodies. 
    • Hygiene & Safety: The clinic must maintain impeccable hygiene standards, using sterile, single-use disposable tools.
    • Client Reviews & Testimonials: Read feedback from previous clients to gauge their satisfaction and experience.
    • Consultation: A professional artist will offer a thorough consultation to discuss your needs and assess your suitability.

    Frequently Asked Questions (FAQ)

    Here are answers to common questions about semi-permanent eyebrow makeup:

    Is semi-permanent makeup painful? While pain tolerance varies, a topical numbing cream is used to minimize discomfort. Most clients describe it as a scratching sensation or mild pressure, generally tolerable.

    How long does semi-permanent eyebrow makeup last? On average, semi-permanent brows last between 1 to 3 years. Factors like skin type, lifestyle, sun exposure, and aftercare influence longevity. Annual touch-ups are recommended to maintain color and crispness.

    Can I choose my eyebrow shape and color? Absolutely! Your artist will work closely with you during the consultation to design a shape that complements your facial features and select a pigment color that matches your hair and skin tone perfectly.

    What if I don’t like the results? Choosing a reputable artist is key. The good news is that semi-permanent makeup fades over time. In rare cases of dissatisfaction, options like saline removal exist, but these should be discussed with a professional.

    Are there any risks or side effects? Risks are minimal when performed by a certified professional in a sterile environment. Mild redness, swelling, and itchiness are common immediately after. Allergic reactions are rare but possible; a patch test may be offered. Proper aftercare is crucial to prevent complications.

    Can I get permanent eyebrows if I have previous tattoo? It depends on the existing tattoo’s saturation and age. A thorough consultation with an experienced artist is necessary to assess if a cover-up or correction is feasible.

    Conclusion

    Eyebrow semi-permanent makeup offers a remarkable transformation, providing you with beautiful, perfectly sculpted brows that last. It’s an investment in convenience, confidence, and effortless beauty, freeing you from the daily demand of eyebrow makeup. By understanding the techniques, benefits, process, and proper aftercare, you can make an informed decision and embark on your journey to flawless, natural-looking brows. Ready to embrace the beauty of low maintenance brows? 

  • Nourish Your Canvas: How to Draw the Perfect Lip Shape (Even on Latex!)

    Beauty is more than skin deep – it’s a form of self-expression, creativity, and care. For makeup lovers and aspiring artists alike, exploring new techniques can be both exciting and empowering. One surprisingly fun and challenging skill to try is how to draw lip shape on latex. This practice not only sharpens your precision but also helps you understand facial symmetry in a whole new way. Whether you’re preparing for a PMU career or simply pushing your creative boundaries, working on latex is an excellent way to level up your lip artistry and discover your signature style.

    Why Lips Matter: More Than Just a Feature

    Have you ever noticed how much difference a beautifully defined lip can make? It’s more than just a splash of color; it’s an anchor for your facial harmony. Lips are incredibly expressive; they play a huge role in communication, from a subtle smile to a passionate declaration. When they’re well-formed, they can alter perceptions, balance your features, and significantly contribute to your overall self-perception. It’s not about striving for some unattainable picture of perfection, but rather about enhancing your natural beauty in a way that makes you feel utterly radiant and completely yourself.

    Understanding Basic Lip Anatomy: Your Foundation for Success

    Before we pick up a liner, let’s quickly talk about what makes lips so unique. Understanding the basic lip structure is fundamental, whether you’re beautifying your own or practicing on another surface.

    The Cupid’s Bow: Your Starting Point

    This is the iconic double curve on your upper lip, resembling a bow. It’s often the very first point you define when drawing lip shape. Its variations are endless – pronounced, soft, rounded, pointed – and mastering yours is key to a balanced look. It acts as an anchor point for your entire lip shape.

    The Philtrum: Connecting the Dots

    This is the vertical groove that runs from the base of your nose to your upper lip. While not directly part of the lip itself, it helps define the structure and central point of your upper lip, linking it seamlessly to the rest of your facial features. Think of it as the subtle roadmap leading to your cupid’s bow.

    Upper vs. Lower Lip Proportions: Achieving Balance

    Generally, an aesthetically pleasing lip proportion often features a slightly fuller lower lip than the upper lip, often a 1:1.6 ratio. However, every face is unique! The goal isn’t to force a specific ratio but to create balance and symmetry that flatters your individual features. This knowledge empowers you to adjust for different lip types, whether you have naturally thin lips, full lips, or slight asymmetry, making your lip enhancement truly bespoke.

    Essential Tools for Lip Artistry (On Skin)

    Having the right tools is half the battle won in makeup application. For stunning lips on your own skin, here are your must-haves:

    Lip Liners: The Architect’s Blueprint

    These are crucial. Lip liners act as the architect’s blueprint for your desired lip shape, allowing you to define, correct, and even overline slightly for volume. Whether you choose traditional pencil, convenient retractable, or precise liquid forms, ensure you match your liner to your lipstick color for seamless blending. They prevent feathering and give your lip makeup longevity.

    Lipsticks: Color, Texture, and Finish

    Oh, the endless possibilities! From bold mattes that make a statement, to elegant satins, juicy glosses, and creamy hydrating formulas, each lipstick offers a different texture and finish. Experiment with how they impact the final look and feel on your lips. A darker matte can make lips appear smaller, while a gloss adds dimension and fullness.

    Brushes & Applicators: Precision and Control

    While many lipsticks come with applicators, a dedicated lip brush offers unparalleled precision and control. It allows for a smoother, more even application, especially with highly pigmented formulas. It’s also fantastic for blending your liner into your lipstick for a flawless finish.

    Concealer & Highlighter: The Secret Weapons

    These are your magic wands for refinement. A little concealer post-application can clean up any rogue edges, creating crisp, defined lines. Highlighter dabbed just on the cupid’s bow and the center of the lower lip can create the illusion of a fuller, more luscious pout, adding dimension and making your lips pop.

    Step-by-Step Guide: Drawing the Perfect Lip Shape (On Your Skin)

    Now, let’s get down to actually drawing those beautiful lips on yourself!

    Preparation: The Clean Canvas

    Just like any artist, you need a prepped surface. Gently exfoliate your lips to remove any dry skin – a soft toothbrush or a lip scrub works wonders. Follow up with a hydrating lip balm. A smooth, moisturized base ensures your makeup glides on flawlessly and lasts longer.

    Outline: Defining Your Desired Shape

    Start with your lip liner. Begin by outlining your cupid’s bow, aiming for symmetry. Then, draw a short line from the center of your lower lip outwards towards each corner. Connect these points, following your natural lip line or slightly overlining for a fuller effect. Remember, it’s about personal preference and making sure your outline is symmetrical.

    Filling In: Building Color and Depth

    Once your outline is perfect, use your lipstick (or a lip brush) to fill in the entire lip area. Start from the center and work your way outwards, ensuring even coverage. For extra intensity and longevity, you can even fill in your entire lip with the liner first before applying lipstick.

    Refinement: Adding Dimension and Longevity

    Blot your lips with a tissue to remove excess product, which helps with longevity. For an extra pop, apply a touch of gloss to the center of your lips. If you’ve made any minor mistakes, a small brush with a hint of concealer can clean up the edges, giving you those super sharp, perfect lips. Finally, a light dusting of translucent powder can help set your lip look.

    Taking it to the Next Level: The Unique Challenge of Latex

    Okay, so you’ve mastered drawing on your own skin. What if you want to push your artistic exploration further? This is where the fascinating world of drawing on different 3D surfaces comes in, particularly something as unconventional as latex. Why latex? Think of it as a creative expression that truly hones your precision and understanding of form beyond the familiar. It’s a completely different tactile experience, demanding adaptability in your beauty techniques and offering a unique challenge that’s incredibly satisfying once mastered. It might seem unusual, but for those who enjoy pushing boundaries in their self-expression, it’s a truly aspirational skill development.

    Special Considerations: Drawing Lips on Latex

    Drawing on latex is vastly different from skin. Here’s what you need to know. 

    Surface Preparation: The Unconventional Base

    Unlike skin, latex is non-porous and can be oily from manufacturing. Before attempting to draw lip shape on latex, clean the surface thoroughly with rubbing alcohol to remove any residues. Ensure it’s completely dry. This provides the best adhesion for your chosen medium, preventing smudging and ensuring your lines are crisp.

    Mediums That Work: Unlike Your Everyday Makeup

    Your typical lipstick and liner won’t work effectively on latex as they’ll just smudge. You need mediums designed for non-porous surfaces. Consider fine-tipped permanent markers (like Sharpies, but test on an inconspicuous area first), acrylic paints (can be too thick if not diluted slightly), or specialized FX makeup designed for prosthetics. These will adhere better and offer more control. For a realistic texture, some artists use oil-based paints or even select types of alcohol-activated makeup if they aim for prosthetics. Start with a fine-tipped pen that allows for precise lines.

    Technique Adaptations: Glide, Don’t Drag

    Because latex is smooth and flexible, your application technique needs to change. Instead of pressing too hard, which can create uneven lines or even indent the surface, use a light, gliding motion. Allow the medium to gently transfer. Multiple light layers are better than one heavy application. This is especially true for drawing lip shape on latex; you want clean, smooth curves, not jagged lines.

    Fixing Mistakes: The Art of Erasure (or Redrawing)

    Mistakes happen! For permanent markers, rubbing alcohol on a cotton swab can often lift the color, but test first to ensure it doesn’t damage the latex. For paints, a clean, damp cloth might work if caught immediately. Sometimes, completely redrawing or working a mistake into a new design is the best approach. Precision is key, so take your time.

    Embracing Imperfection and Finding Your Signature Look

    Whether you’re perfecting your pout in the mirror or meticulously drawing lip shape on latex, remember this: self-care and beauty are deeply personal. They’re about self-acceptance and individual expression, not rigid rules or chasing an impossible ideal. Your authentic beauty shines when you embrace what makes you unique. Don’t be afraid to experiment with different lip shapes, colors, and techniques. Maybe a bold red feels empowering one day, while a soft nude speaks to your soul the next. This journey of beauty experimentation ultimately contributes to your overall well-being and confidence, because when you feel good, it truly shows.

    Conclusion: Your Lips, Your Story

    Mastering the art of lip shape, whether on your own beautiful face or as an artistic exercise on an unusual canvas like latex, is a journey of precision, creativity, and self-discovery. It reminds us that makeup can be far more than just a routine; it’s a profound form of self-love and creative freedom. 

    So, go ahead, experiment, try new things, and let your lips tell your unique story. If you want to learn even more about enhancing your features through lip tinting, blush tattoo, or semi-permanent makeup, check out Hivivi’s premium beauty services – a trusted source for PMU artistry and confidence-boosting beauty care.

  • Lip Tattoo Before and After: Your Complete Guide to Luscious, Lasting Lips

    Imagine waking up every day to perfectly tinted, defined, and fuller-looking lips without ever reaching for a lipstick or liner. This isn’t a dream; it’s the reality offered by cosmetic lip tattooing. This procedure, also known as a lip blush tattoo or permanent lip color, is a semi-permanent makeup technique that enhances your natural lip shape and adds a beautiful wash of color.

    Understanding the complete lip tattoo before and after transformation is crucial for anyone considering this treatment. It’s not just about the final result; it’s about the preparation, the procedure itself, and the entire healing journey. This guide will walk you through every stage, providing a clear picture of what to expect, from your initial consultation to your long-lasting, luscious lips. Get ready to discover how this innovative form of lip enhancement can redefine your daily routine and boost your confidence.

    The “Before”: What to Expect Pre-Procedure

    Setting the Stage for Your Lip Transformation

    A stunning final result begins long before you recline in the artist’s chair. Proper preparation is key to a smooth procedure and optimal pigment retention. This “before” phase is all about setting the foundation for success.

    Consultation Process:

    Your journey starts with a thorough consultation. This is a critical conversation with your artist where you will:

    • Discuss your goals, including desired shape, color saturation, and overall style—from a subtle tint to a more defined full lip tattoo.
    • Analyze your natural lip color and skin undertones to select the perfect pigment that will heal to a flattering shade.
    • Collaborate on a design that enhances your facial symmetry and complements your unique features.

    Preparation Steps:

    In the days leading up to your appointment, you’ll need to follow specific instructions to prepare your lips. This typically includes:

    • Avoiding blood thinners like aspirin, certain supplements, alcohol, and caffeine for at least 24-48 hours to minimize bleeding and swelling.
    • Staying well-hydrated by drinking plenty of water, as healthy, moisturized skin retains pigment better.
    • If you have a history of cold sores (herpes simplex virus), your artist will likely recommend consulting your doctor for a preventative antiviral medication.
    • Gently exfoliating your lips a few days prior and keeping them consistently moisturized.

    Choosing the Right Artist/Clinic:

    Your results are directly tied to the skill of your technician. Look for an experienced, certified artist with an extensive portfolio of lip tattoos before and after photos. Reading reviews and ensuring the clinic adheres to the highest hygiene standards is non-negotiable.

    You can explore real experiences and before-and-after lip blush journeys shared on vivitag to better visualize what’s possible.

    The Procedure Itself: A Step-by-Step Experience

    What Happens During Your Lip Tattoo Session

    With preparation complete, it’s time for the appointment. A typical cosmetic lip tattooing session is a meticulous process designed for comfort and precision, usually lasting between 2 to 3 hours.

    Welcome and Numbing:

    Upon arrival, the first step is ensuring your comfort. A strong, topical anesthetic or numbing cream is applied to your lips and the surrounding area. This cream is left to activate for about 20-30 minutes, significantly minimizing any potential lip tattoo pain during the procedure. Most clients report feeling only slight vibrations from the machine.

    Mapping and Design:

    While you’re numbing, the artist will finalize the design. They will use a pencil to draw a precise outline of your enhanced lip shape. This is your opportunity to review the map, request adjustments, and give your final approval before any pigment is applied. Nothing is tattooed until you are 100% happy with the proposed shape.

    Pigment Implantation:

    Once you are numb and the design is approved, the tattooing begins. The artist uses a specialized digital machine with a very fine needle to deposit custom-blended lip tattoo pigments into the upper layer of your skin. They work in careful layers, gradually building the color to achieve the desired saturation and blending, whether you’ve chosen a soft ombre look or a more uniform color.

    The Immediate “After”: Day by Day Healing Journey

    Understanding the Transformations After Your Lip Tattoo

    The lip tattoo healing process is a journey with distinct phases. What you see immediately after the procedure is not the final result. Understanding this day-by-day evolution is essential for managing expectations and avoiding unnecessary worry.

    • Day 1: Swelling and Brightness
      Immediately after your session, expect your lips to be swollen and the color to appear extremely bright and intense, almost like a bold lipstick. This is completely normal. The lip tattoo swelling is a natural response and can be managed with clean, cool compresses. You may also notice some clear fluid weeping, which you’ll gently blot away as per your aftercare instructions. The primary focus is keeping the area clean and applying the recommended healing balm.
    • Day 2-3: Scabbing and Dryness
      Swelling will begin to subside, but your lips will feel very dry and tight. This is when the initial lip tattoo scabbing or flaking stage begins. A thin layer of pigment will start to form a crust. It is absolutely critical that you do not pick, peel, or scratch this layer. Let it fall off naturally to avoid pulling out the pigment and causing patchy results.
    • Day 4-7: Flaking and Fading
      This is the peak of the flaking phase. As the scabs naturally slough off, they take a lot of the initial color with them. The color underneath may look incredibly light, patchy, or almost non-existent. Many clients experience a “ghosting phase” where it seems the color has vanished. Have faith in the process and continue your diligent aftercare, focusing on keeping the lips moisturized.
    • Week 2-4: Color Bloom and Settling
      After the flaking is complete, the magic begins. The skin is healed on the surface, and the true color starts to “bloom” or re-emerge from the deeper layers of the skin. The color will gradually darken and settle, looking more natural and closer to your intended shade each day.
    • Month 1-2: Full-Color Development
      By the 6-8 week mark, the color is fully developed, and you can see your final lip tattoo results. The lip tissue is completely healed, revealing the soft, subtle, or vibrant tint you envisioned. This is when you’ll return for your touch-up session to perfect any areas and boost the color for longer-lasting results.

    Common Concerns & FAQs

    Addressing Your Most Pressing Questions

    It’s natural to have questions before committing to a cosmetic procedure. Here are answers to some of the most common concerns about lip blush tattoos.

    • Is it painful? Thanks to effective topical numbing cream, the discomfort is minimal. Most clients describe the sensation as a gentle vibration or light scratching rather than pain.
    • How much does it cost? The lip tattoo cost varies based on the artist’s experience, location, and the specific technique used. It’s an investment in your appearance and convenience, saving you time and money on lip products over time.
    • Can I choose any color? While you have a wide range of options, your artist will guide you toward lip tattoo pigments that complement your natural lip base and skin tone to ensure the healed result is flattering and beautiful.
    • Are there any risks or side effects? As with any tattoo, risks include infection, allergic reaction, or cold sore outbreaks if you are prone to them. Choosing a reputable, certified artist who follows strict sanitary protocols dramatically minimizes these risks.

    Conclusion: Ready for Your Lip Tattoo Journey?

    The journey of a lip tattoo before and after is truly transformative, offering a long-lasting solution for beautifully enhanced lips. From the careful preparation to the meticulous procedure and the crucial healing process, each step plays a vital role in achieving your desired outcome. The result is not just enhanced beauty but newfound confidence and the daily convenience of smudge-proof, perfect color.

    If you’re ready to say goodbye to daily lipstick application and hello to effortlessly luscious lips, the first step is a simple conversation. We encourage you to book a consultation to discuss your goals and see if this amazing procedure is right for you.

  • Hello world!

    Welcome to WordPress. This is your first post. Edit or delete it, then start writing!